- Shop Now
- Burncoose Specialities
- This Month
- Offers & Promotions
- RHS Chelsea Flower Show 2024
- 40 years at Burncoose
- Engage With Us
- Information, Help & Advice
- About Us & Our Services
- Terms & Conditions
- Log In / Register
Chapters
Magnolia - Propagation
Planting Magnolia from Seeds
Magnolias can be propagated in three ways:-
- i)From seed – the majority of magnolias are propagated in this way.
- ii)From cuttings – in reality only the smaller growing shrub or soulangeana varieties will propagate from cuttings. Perhaps only 15-20% of the magnolia varieties grown in the UK can be propagated in this way and, even then, this is not something which the amateur will easily succeed in.
- iii)By grafting – the majority of tree (sized) magnolias are propagated by grafting scions from named magnolia varieties onto another seedling magnolia rootstock. This is a difficult and complicated procedure which needs specialist greenhouse equipment and is therefore something which is best left to the experts.
We will therefore concentrate on growing magnolia seed. Details of each picture are given below
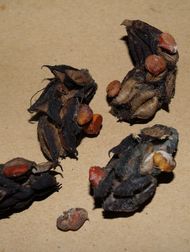





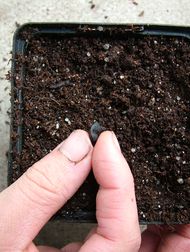


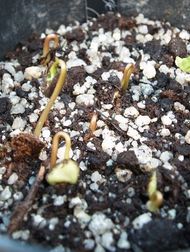





Figs. 1 & 2. When you have collected your long ripe magnolia seed pods and their bright orange seeds, remove the seeds from the pods and store them in a mouse proof container. Do not put them in full sun or somewhere hot such as a radiator but do not put them somewhere damp where they will rot either. A sealed plastic box is fine and do not be worried if the seeds grow a little mould.
We have more detailed 3-part article on collecting, storing and planting seeds, with specific sections on Magnolia seed collection and Magnolia seed planting if you are interested in this in more detail.
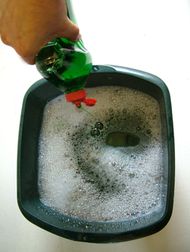
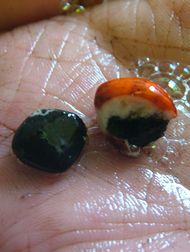
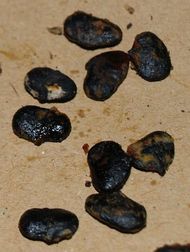
Figs. 3 - 6. In early March prepare a box or tray of say 18” x 12” x 3” (deep) with a mixture of soil, peat/compost and a little sand. The tray or box must have good drainage. Take each seed and rub it between finger and thumb, or wash in washing up liquid, to remove the sticky orange skin around the seed which in the autumn was designed to make a bird or rodent see and eat it. All you are doing is what the animal’s stomach would have done to remove the seed covering. By March it will probably look more brown than orange but it still needs removing. If you do not do this your germination rates will reduce by 50-70%.
A box of the size outlined above will take about 40-50 individual seeds placed about an inch below the surface.
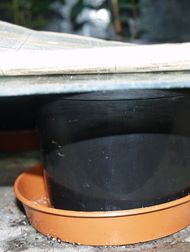
Fig. 7. Then cover the box or tray with a piece of glass to make it mouse and slug proof. This is essential!
Fig. 8. After 6 or so weeks you will see germination taking place but this will occur sporadically (hopefully) over several weeks and not all the magnolia seedlings will appear at once. The temptation to remove the glass is huge but be careful. Build a bit of a frame over the seedlings and keep the glass over the top. Again this will keep mice out but small slugs and snails can still be a problem.
Fig. 9. In hot weather in May or June put newspaper over the glass to shelter the young seedlings from scorching in direct sun. Once they produce their secondary and tertiary leaves this will not be necessary.
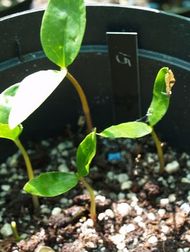
Fig. 10 & 11.If you have done everything right you will, by September, have a tray of seedlings which are variously between 4 and 12 inches tall.
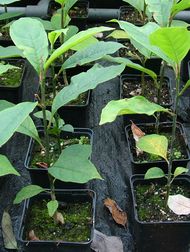
Leave well alone while they are in leaf. However, when they shed their leaves and go dormant you can dismember the box or tray and separate the roots of the individual plants. Pot them on into 1 litre pots before they come into leaf and then again into 3 litre pots in the autumn.
Fig. 12.You then have a plant – perhaps even a unique hybrid of your very own – which should be big enough to plant out in the garden the next spring. Alternatively, if you are a magnolia breeder, you will have a perfect rootstock for grafting in the following year.


