- Shop Now
- Burncoose Specialities
- This Month
- Offers & Promotions
- RHS Chelsea Flower Show 2024
- 40 years at Burncoose
- Engage With Us
- Information, Help & Advice
- About Us & Our Services
- Terms & Conditions
- Log In / Register

Chapters
- Growing from seed
- Rhododendron Seed Collecting - Video Tip
- Potting on Rhododendron seedlings - Video Tip
- Propagation Program - Video Tip
- Growing from cuttings
- Propagation by taking semi-ripe cuttings - Video Tip
- Propagation by layering - Video Tip
- Propagation by other means
- Making a hybrid - Video Tip
- Making a hairy or scaly cross - Video Tip
- Caerhays bred 'Red Centurian'
- Plants
Rhododendron - Propagation
Growing from seed
Rhododendron seed are best kept over winter in airtight sealed containers which should be dry but not heated. Rhododendron seed which have been baked or dried will never germinate next spring. Those rhododendrons which grow in higher altitudes are best over wintered in a sealed container in the fridge. Some rhododendron seed can even be lightly frozen with no ill effects but, in the main, this is not really necessary.
In March or April when light levels increase you should consider sowing rhododendron seed. In the wild or even in your own garden you will find rhododendron seedlings germinating in damp mossy environments in the partial shade of other surrounding plants. Some growers therefore prefer to sow rhododendron seed into trays of moss collected from damp stony sites and re-rooted into a seed tray. However this is not strictly speaking necessary.


Prepare a pot (or seed tray) with a mixture of peat and a little well sieved soil. The peat must also have been lightly sieved so that there are no lumps and that an even tilth covers the top of the pot. Since rhododendron seed is so tiny resembling dust you may have many thousands of seeds available to sow. Do not worry about sowing every seed you have and do not cram too many potential seedlings into a small pot. Certainly you want the seedlings to germinate thickly but they must have space to grow.
Scatter or sprinkle the seed on to the surface of the pot and perhaps gently stir the surface with a nail. Do not bury the seed under the soil as surface germination is entirely natural in the wild.
With such small seed even the most gentle application of water to the surface of the pot will wash the seed away. Instead the pot must be placed in another tray or saucer so that it can be watered from below and the pot will draw up the necessary water to the surface to enable the seed to germinate.
Germination takes only 4-8 weeks at most. While you wait it is sensible to cover the top of the pot with a piece of glass. This raises the temperature and humidity which encourages germination. It also keeps snails and other rodents off the seed as they germinate.< /p>
Once the seedlings start to germinate the glass needs to be raised up off the top of the pot to encourage air circulation. The problem now is scorching by the sun which is a real threat to the seedlings for the first 12 weeks after germination. Instead the pots should be covered with newspaper on hot sunny days although this should be removed on dull ones.Do not be alarmed if the seedlings germinate unevenly or if they do not all look the same. Very often several pollinators may have reached the flower and so lots of different hybrid parents may be involved.By September the seedlings should be large enough to be water from the top but this may not be the case with smaller growing varieties.
As autumn and winter approach the key problem now is botrytis and the seedlings rotting off from a white mould. This is caused by poor air circulation and excess humidity. Keeping the greenhouse door open by day is a good start but an antifungal spray once a month is a sensible precaution. If some, or even the majority, of your seedlings make it through to next spring you will have done well. It is not an easy business and a few days inattention can so easily ruin a good crop.
Once spring arrives you can ‘prick out’ the best of your seedlings into small individual pots or perhaps into seed boxes or trays where they should be spaced an inch or two apart. A mixture of peat and sand (for drainage) with perhaps a little loamy (acidic) soil is best.
Again great care is needed to nurture the seedlings into their second summer. They may still need the newspaper treatment and they will still try to rot off in damp spells if you over water them.
By the third spring you will have a plant which is ready for at least a 2 litre pot. Many of the rarer and more difficult rhododendrons, propagation wise, prefer to be grown in beds of peat and soil rather than pots. Their root systems spread better and they get less waterlogged in winter in the ground than in pots. Smaller growing rhododendrons might just about be ready to plant out in the garden in the fourth or fifth year after the seed were sown. However, larger growing and especially big leafed rhododendrons can take several years more to grow on to a size where they can safely be planted out.
How long you have to wait for the first flowering varies between species. The big leafed rhododendron species such as Rh. sinogrande or Rh. macabeanum might not flower until they are 20 or more years old. However the majority of rhododendrons will perform very much earlier than this.
Nevertheless growing rhododendrons from seed is a time consuming labour of love. Other methods of propagation are easier and quicker.
We have more 3-part article on collecting, storing and planting seeds, with specific sections on Rhododendron seed collection and Rhododendron seed planting if you are interested in this in more detail.
Rhododendron Seed Collecting - Video Tip
Potting on Rhododendron seedlings - Video Tip
Propagation Program - Video Tip
Three year program to introduce rare and unusual species and hybrids of Rhododendron.
Growing from cuttings
If a rhododendron will propagate from cuttings then this is far and away the preferred route for nurserymen and growers. The amateur without proper access to specialist mist bench propagation facilities is probably best concentrating on growing seeds. Those with small electric propagation units in their greenhouses may well find that although they can root many other woody shrubs rhododendrons are simply too difficult.
No one can pretend that propagating rhododendrons from cuttings is easy. Furthermore by no means all species of rhododendrons can be propagated form cuttings. As a very general rule of thumb hairy (or elepidote) rhododendrons are more likely to root relatively easily in comparson to scaly (lepidote) species and varieties. More specifically there are many many varieties which will propagate only occasionally from cuttings for reasons which are unclear. Perhaps there is only a small window of time in which a particular rhododendron species will respond favourably to the mist bench. In different types of weather (and given our irregular summers) one may only hit the window correctly only one year in 5. For 4 years the cuttings wither and die but, if you persevere, then just occasionally you may be surprised.
As another sweeping generalisation smaller growing rhododendrons normally propagate fairly easily from cuttings. However large leaf rhododendrons are more or less impossible from cuttings and have to be grown from seed instead.
Rhododendron cuttings are best taken in late July to mid August in a hot dry summer and perhaps a little later in a very wet one as this year and last.
If the new growth is still floppy and bends easily between your fingers you are wasting your time attempting to take a cutting. They are too tender and will quickly rot in the mist bench. Conversely if the new growth if stiff and rigid when you try to bend it the cutting is probably too old or hard to be worth making an effort with.
Deciding exactly when to take rhododendron cuttings is one of the key skills of a good propagator and is not something which can be learnt from text books. While a propagator might reckon to successfully grow on 85-90% of all the camellia cuttings which he takes the figure for rhododendrons might be only 40-60% and this can vary from year to year. Deciding exactly when to propagate a particular species is a matter of trial and error in different subsequent seasons. Good note keeping is therefore essential but there is no certainty of success every year with many species which would be much more widely grown if they could more readily be propagated from cuttings.
The old wives tale is that rhododendron cuttings should never be taken and inserted in the mist bench when it is raining. Who can say if there is any scientific evidence to support this but our own experiences would suggest that there definitely is.
.jpg "1.")
.jpg "1.")
.jpg "2.")
.jpg "2.")
.jpg "3.")
.jpg "3.")
.jpg "4.")
.jpg "4.")
.jpg "5.")
.jpg "5.")
.jpg "6.")
.jpg "6.")
.jpg "7.")
.jpg "7.")
.jpg "8.")
.jpg "8.")
1) Your ideal cutting is one which can be extracted or broken off from last years old wood with a proper ‘heel’. If this years new growth is only a single new shoot rather than two or three then it will not have a heel as such but there will be a callous between the new and old growth. Cut the would be cutting below the callous mark.
2) Ideally you should only select the most healthy and vigorous new shoots to take as cuttings. Do not select new growth which is much more than 4 or 5 inches in length if this is possible as anything longer will struggle to root properly and is too large, in the main, for the mist bench.
3-6) Within only a few hours and preferably minutes from collecting your cuttings sit down and prepare them for the mist bench. You need a very sharp knife to pare back the heel or incise the stem in the middle of the callous. Those rhododendrons which have larger leaves will benefit from having their leaves cut in half. You may think this odd but it has two key advantages. Firstly the cutting does not have to waste energy supporting more leaf surface than is strictly necessary. This should encourage it to put more energy into rooting. Secondly, by reducing the amount of touching leaf cover in the mist bench, the dangers of botrytis are reduced.
7) Once you have finished with the knife dip the cutting(s) into a hormone rooting liquid or powder and insert them into the mist bench (or tray on the mist bench). Around a third of the cutting should be below the surface but this clearly varies considerably between different species with different growth habits.
8) Rhododendron cuttings take at least 6, and more normally 8, months to callous and then root out sufficiently to be potted up in say April of the following year. The mist bench needs to be kept at an even temperature of 65ºF throughout the winter with mist spray regulated according to the temperature and amount of sunlight. Regular spraying for rot or botrytis in these sorts of humid environment is essential.
Any cuttings which go brown and fail must be quickly removed to prevent any fungal rot or other infection spreading.
If all goes well you will have a saleable plant or one which you would be happy to plant out in your own garden in about half the time necessary to grow a rhododendron from seed.
Propagation by taking semi-ripe cuttings - Video Tip
Rhododendron 'Cornish Red'
Scented Rhododendrons
Propagation by layering - Video Tip
Short version
Longer version
Lifting layers and replanting
Propagation by other means


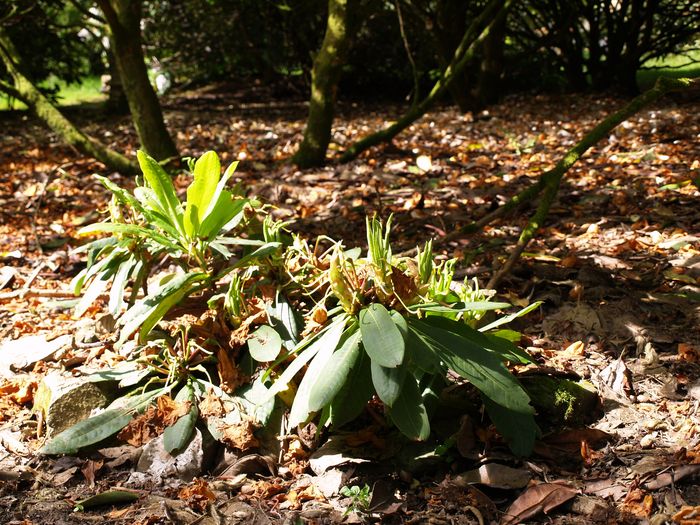

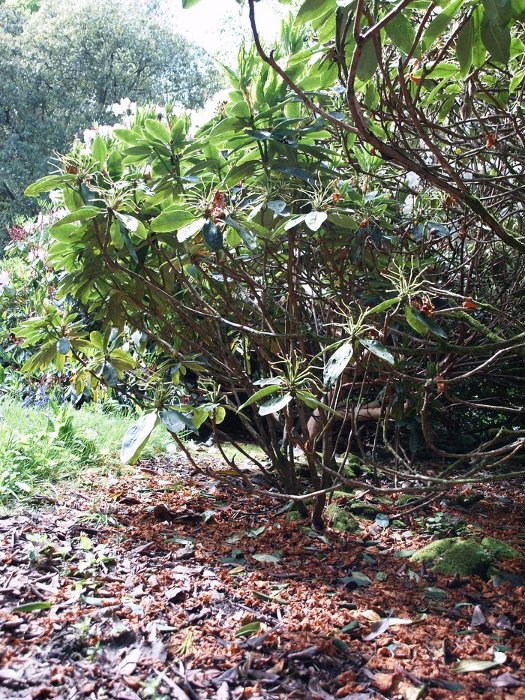


A. Layering - Those rhododendrons which never root from cuttings or which are simply too large for the mist bench can often only be propagated by layering. If a plant is very old and about to die and its seed is either unviable or does not come true then this may be your only option left.
This is a time consuming business which involves locating a branch on the plant which you wish to propagate which is near enough to the ground to be bent down to ground level without snapping it.
The ground is then cleared of vegetation, dug over, and leaf mould or peat is added. Pegs or crooks are then cut from some hard and durable wood such as yew and these pegs are used to peg down the chosen branch into the ground. A layer of soil is placed over the layer and large stones are placed on top of this again.
In 2 or 3 years roots should start to form under the stone and the layered branches should start to look vigorous and upright. Perhaps more vigorous than the rest of the mother plant. At this time you can risk cutting through half or more of the branch which was originally attached to the mother plant.
After another couple of years the layer(s) will be entirely independent with their own root system. They can then be carefully lifted and moved to a new location in March or April.
B. Grafting - This is another specialist technique which is only likely to be successful if undertaken by a professional. It is also only worth the cost and effort if there is simply no other way of propagating a particularly choice species or variety.
Basically one selects a root stock on to which the choice variety will be grafted. The root stock is usually a very common and readily available rhododendron such as Rh. ponticum or its close hybrids.
A piece of new growth from the choice plant is inserted into a graft or cut in the side of the main stem of the root stock. The graft is sealed and bound and, if it ‘takes’, then all the growth on the root stock is removed so that the piece of the choice plant will take over using the sustenance of the old root stock.
C. Micropropagation- If propagation of a particular variety or species is impossible by conventional means then the new last resort is tissue culture.Basically small pieces of clean tissue from a leaf bud or flower are inserted into a medium or gel in a plant laboratory which will supposedly encourage the tissue to clone and multiply itself. If this does work the tiny plantlets can then be grown on and weaned from the gel into a more conventional potting mix.
However the fundamental rule is that any plant which is difficult to propagate by conventional means (i.e. seed or cuttings) is ALSO going to be very difficult to clone in a tissue culture laboratory.
Very few laboratories have yet been able to produce rare rhododendrons in quantities which might make the process commercially viable. The science is still in the development stage and there are very few laboratories in the UK which will undertake experimental work of this sort. In Cornwall we are fortunate to have a laboratory whose purpose is to try and propagate original plant introductions from China which might otherwise die out in cultivation as a result of old age. This is however a unique service provided by Defra and Cornish gardens which is not widely available.
Making a hybrid - Video Tip
Making a hairy or scaly cross - Video Tip
Caerhays bred 'Red Centurian'